Grid
The Grid is where you work with your data. Here’s what you’ll find on it, from top to bottom.
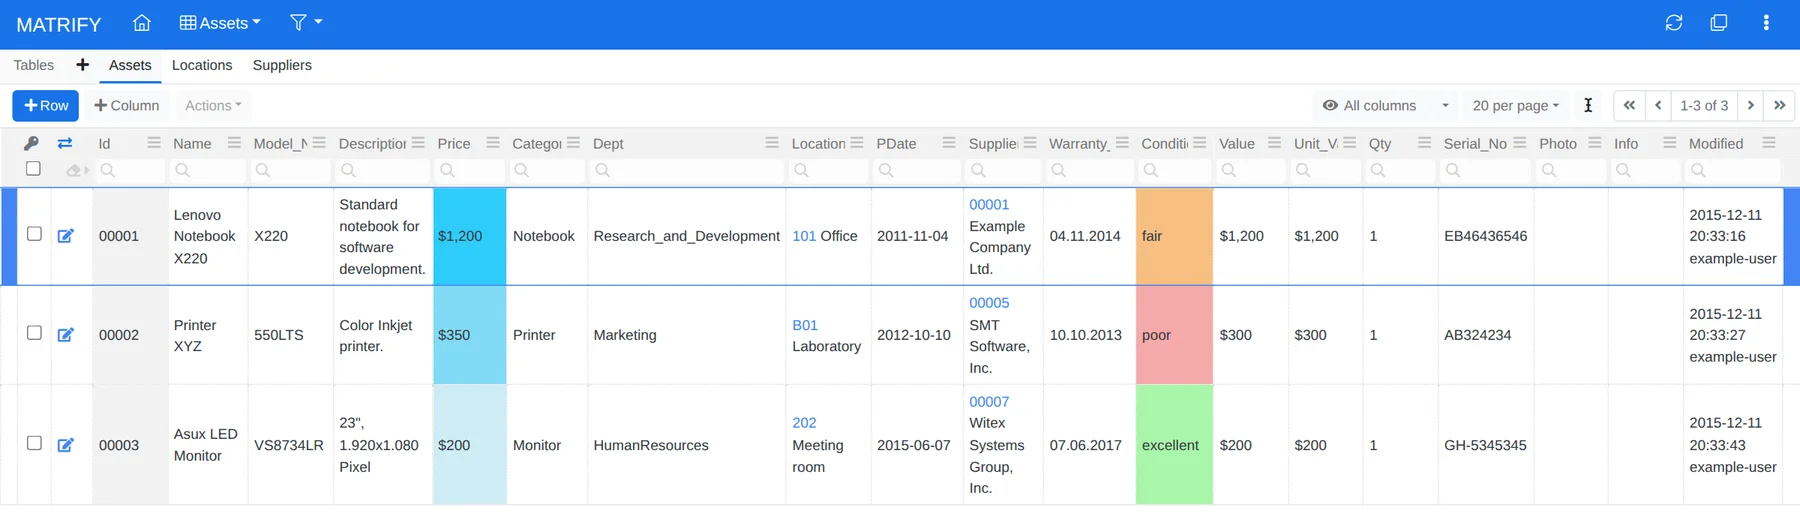
Top bar
- Table menu: lists the tables you can access, so you can move quickly between databases and tables. The first database on the list is the one you’re currently using.
- Filter menu: creates, configures and applies filters. See Manage Filters.
- Refresh: reloads the table.
Below the top bar, tabs give you direct access to the other tables in the database.
Toolbar
+ Rowopens a dialog for creating a new record.+ Columnopens a dialog for creating a new column.- Actions applies to the records you’ve ticked, for example to delete them.
- All columns lets you show and hide columns, so you can focus on a task and fit the content to your screen width.
- Per page sets the maximum number of records on a page.
- The paging buttons move forwards and backwards through all the records in the table.
When a filter or search hides records, the toolbar shows how many are hidden.
Column visibility applies to each filter separately, so the visible columns can change with the selected filter. Both column visibility and the page size are saved in your browser. That means you can show more columns on a large screen and fewer records on a phone, which we recommend for mobile devices.
Tip: Hiding columns or showing fewer records per page makes the table load faster, because less data is transferred.
Column headers
Click a column’s name to open its menu, for example to sort, change its type or set a conditional background color. See Managing Columns.
Type a search term into the field below a column name to show only the records that contain it. You can search several columns at the same time. To remove all search terms and the applied filter and show every record, click the eraser icon at the left of the search fields.
Tip: If you often search for the same terms, save them as a filter. See Manage Filters.
Records
Click a record to select it. Click it again, or click its pencil icon, to open the dialog and edit it. The blue cursor marks the selected record.
Keyboard and mouse
Keys:
up move the cursor up
down move the cursor down
enter open the edit dialog
insert create a new record
delete delete the record
Mouse:
click on Record select the record, or open the edit dialog if it’s already selected
double-click on Record edit the record